Sunday, November 24, 2013

How to Lock Whatsapp with Password in Android Iphone and Blackberry

Posted by Ramesh Krishna 
Here is one more tip for people who would like to have some privacy on the messages in whatsapp. As the WhatsApp is not having inbuilt security feature we are using the Phone’s inbuilt pin and other pattern locking apps to protect messages from the unknown people, But we can’t block our friends and family members from accessing the whats app messages  with the phone’s inbuilt authentications as they knew our phone’s pin and other pattern locks!.
lock+whatsapp
Therefore we need a system like double authentication which ask for another pin or password  to access the messages in our whats app messenger!
We have tested so many apps which can block the unauthorized access to the WhatsApp Messages, finally we came up with a best app which is easy to use and simple in user interference.

Whatsapp Lock for Android:

whatsapp
  • This is a simple App which  can solve our problem and give complete privacy for the messages on Whatsapp 
  • The best feature of this app is it can take the photo of those who tried to access your Whatsapp messages with invalid pin! 
  • Simple and easy user Interference. 
  •  It is available for absolutely free on Google PlayStore. You can this app From Here. 
  •  Supports Android 2.2 and above
Download Whatsapp Lock Here

How To Lock Whatsapp on Iphone:

Till now there is not any genuine app that can lock only Whatsapp in iphone and ipad.In store there are many fake apps available which tells that this app can protect Whatsapp with password.That all are waste and doesn't work.I recommend you to not to buy that apps and if you want to protect your Whatsapp then you must go for home screen lock for now.If we found any genuine app we will update here.
Must Check: Whatsapp For PC free Download

Lock Whatsapp in Blackberry:

Yes here is simple app to lock Whatsapp messenger on your blackberry.Lock for Whatsapp allows you to keep your own password  for Whatsapp.

History About Android Versions InfoGraphic

Posted by Vinay Goud 
Android achieved some remarkable stones in last few years.You Might be Thinking Android is Google product yes its true but from 2005. Actually Android was founded by Andy Rubin,Rich Minner,Chris white and nick sears in year 2003.At first Android was developed for digital cameras as third party apps then shifted to mobiles.Google purchased android in 2005 as said above.Then after 2 years i.e on November 5th 2007 Google officially announced the development on Android OS.
History-of-Androidv5b.png++975%C3%973574+


Android Version till Now:

  • Android 1.5                         CupCake
  • Android 1.6                         Donut
  • Android2.0/2.1                     Eclair
  • Android 2.2                         Froyo
  • Android 2.3                         Ginegrbread
  • Android 3.0/3.1/3.2              Honeycomb
  • Android 4.0 and Later           Icecream Sandwitch
  • Android 4.1                          Jeally bean
  • and Finally Android 4.4         Kitkat
Interesting information right? Yes I feel
If you Want some more amazing facts and History about Android then Check below Info graphic developed by startapp

History-of-Androidv5b
 So Hows it? DO share your experience in the below comments and dont forget to share this with your friends on Social media.

How To Download and Install Android 4.4 Kitkat Launcher on any Android mobile


We have Discussed in the earlier article about all possible features in the Android 4.4 Kitkat version of Android. With the most attractive specifications in this version of android, It is finally released in the market and is available for you to launch it in your Smart phone. Do you have to buy a new phone for it? Not really!
android+kitkat++mobile+version
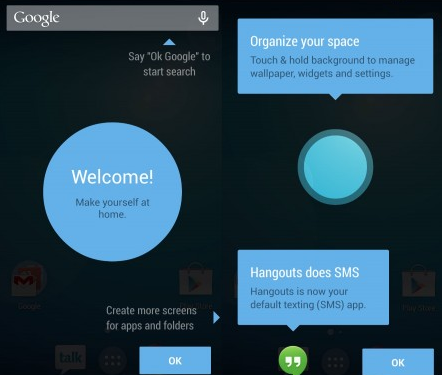
Do you have to to go through the rooting process or installing custom ROM Builds? Here is a big NO! Thanks to XDA Developers that have extracted the Android Kitkat launcher from Goolge Nexus 5 and converted it to a simple APK Installation file. This APK Installation is heck a very easy process and today in this article I am going to show you the step by step process.
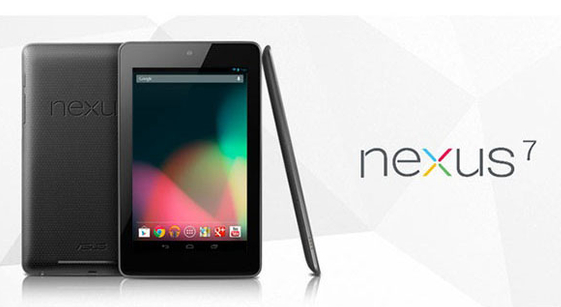
And If you own Google Nexus 4 or Nexus 7 then there's a good news for you that you are soon going to have the official Android Kitkat 4.4 update for your Device.

google+nexus+7
For the others, Nothing to worry about. Here are a few steps you can follow to get the new Android Kitkat 4.4 version. 

Step By Step Process:

  • Firstly you need to download the Android Kitkat 4.4 Launcher Here.
  • Make sure your Device is with Android OS 4.1 Jelly bean or above.
  • Extract the download file using Winrar
  • Once you extract the download files.You can find the 3 apk files (Prebuilt Gms Core.apk, Velvet.apk, GoogleHome.apk) Now move all this apk apps to your phone memory
  • After moving to phone memory install these APK files on your mobile.
First install PrebuiltGmsCore.apk then Velvet.apk  and lastly GoogleHome.apk

  • Once you done with above step then you can select the Android Kitkat Launcher by pressing and holding the ‘Home’ button.

android+kitkat+launcher
That's it now you have successfully installed android kitkat launcher in your smart phone.If you find any difficultly in any of above steps or find any error comment below we will help you out

How to Create Wifi Hotspot in Windows 7 and Windows 8 -Best ways


If you are one who looking to convert your PC as Wifi Hotspot then you are done.Here in this article We listed best 2 ways to convert your laptop as Wifi router.Once you turn you PC as WiFi router you can connect devices such as Android, another laptops etc.

how-to-create-a-wifi-hotspot


Advantages of converting your laptop to a wifi router.

  • You can Enjoy internet in your wifi devices, any where you want but depend on your laptop wireless range.
  • Get rid of sitting at one place with wired internet connection.
  • If you have smart phone then you can get access to internet on your mobile.
There are numerous of method to turn your laptop a wifi spot (Windows 7 and 8 only),
Such as By command promote (only in windows 8) and by installing 3rd party software compatible with both.

First Method-

You need to follow below steps care fully in order to make your laptop wifi router successfully.
Step.1: Open run (windows key+R), type ncpa.npl.

windows8-run
Step.2: A new window is in front of you. There select wireless Network adapter and sharing center and select properties.
rightclick-wifi
Step.3: In wifi properties Select share, followed by Allow Others Network users to connect.
wifi-properties
Note- Never Tick 2nd Option.
Step.4: Now Open Command Promote As administrative.
cmd-command-promopt-windows8
Step.5: Don't worry by looking in below Command promote codes in picture, those are very simple.
             You need to copy and paste below command in command promote.
"netsh wlan set hostednetwork mode=allow ssid=”techbymak” key=”techbymak”"
window8-cmd
You will see SSid which is actually your network name, which we are going to create.
Step.6:Now you need to start the network By using below command.
"netsh wlan start hostednetwork"
Every thing is done. Now you can observe your laptop is working like a router.
Note:To check How many Devices Are connected to your router you need to enter below command in command promote.
"netsh wlan show hostednetwork"
This was the first method to make your laptop a router.

Second Method:

We are using a Software in this method to make laptop Wifi router, this method is compatible with both windows 7 and 8.The name of the software is Virtual Router.Download the software and install it.( once you downloaded it will come in zip format so extract it)

When you have done all these make sure are connected to the network you want to share and then launch VirtualRouterPlus.exe.
Remember - Run the .Exe as administrative.

Let's Create A Network.

  • In this method we are using Virtual router so it is essential to create a new network.
  • It is similar to 1st method, here SSid also means the name of the network which we are creating, you can enter what you want.
virtual_router_plus_5
  • If you want you can enter Password, it is important to prevent others to use your internet service. 
  • Now here you need to indicate which network is to be shared and then click on start Virtual Router.
I hope you guys like the article and feel useful for you .If you have any problem in above steps feel free to comment below we ill help you out.

Wednesday, September 25, 2013

How to Check If Sent Email is Read or Not in Gmail Yahoo


Facebook and Whatsapp has a last seen feature.i.e when person opens your message it will simply indicate a last seen status which will helps you to confirm the person has got your message and read it.But this feature is not available in Gmail and Yahoo.
now+track+sent+emails

When you  send some important mail for your friends,family or clients.Then you have to wait until the recipient has received your mail and open it or not! It will be not comfortable all the time and even some times the recipient ignores to send reply for your mail,then you might be in a confusion whether the mail is reached or not.So to remove all this hasty things here we got a solution for that.
Yes Now Get Notified when Your Sent Email is read or not.

1.Using RightBox Chrome Extension:

rightbox+to+tracke+emails

  • You can track your Email by using simple chrome extension Rightbox
  • After installing extension on your browser.Open your Gmail inbox if you already opened it just refresh it.
  • Now a pop arises the click Continue and then allow Rightbox to access Gmail
click+continue
  • Now Compose your mail add recipient and then click on Track below and send the mail.
click+on+track
  • When the recipient reads your mail you will get notify with details like IP address and location just like below.
email+tracking+reply

RightBox is also helpful for you to Sechdule Emails in future ! Right box send tracking email to your mail not based on any browser extension notifications so you can get tracking mails even though you access your mail from any other computer.
source:techtricks

Tuesday, September 24, 2013

Customize folders with different colors in Windows :


There are many softwares available today over the internet which can Customize your Computer in an efficient manner that it looks so attractive as well as it becomes very easy to use. We always want our computer to be clean and well organized so that whenever we need to access something or need to search a particular file/folder in our computer we could find it easily.
As similar to that, here I am going to share a software through which you can easily assign your favorite colors to your desired folders in order to differentiate them easily and to ease of access.
Customize folders with colors

How do i Customize folders with different colors ?


Just follow the two simple steps given below to customize your folder :

Step 1 :

First of all Download and install the software FolderColorizer. It is tested and 100% virus free. You can download it from here : DOWNLOAD FOLDERCOLORIZER

Step 2 :

Now after installing the software, simply right click on any folder which you wish to customize. Here when you right click on folder, you will see a new option in the context menu i.e. Colorize !. Now simply go to that option and one submenu will appear. Now choose any color you want to assign to this folder.
Although it is a free software for everyone to use it but while you will use this software for the very first time , it will just ask your email id for activation of this software. But no need to worry because you wont need to confirm the activation by logging in to your e mail account. Even if you don’t wish to share your e mail id with developers of this software you can do it because product will be activated automatically once you enter any email id. So you can also enter any fake id if you want.
For your convenience I am providing you a screenshot of above mentioned procedure for changing folder color :
Customize folders with different Colors

In this way you will be able to easily organize folders in any of your drive weather C: , D: or any other drive. You can also assign different colors to several folders in the same drive to give it more attractive and cool looks.
source : smarttricks

Sunday, September 22, 2013


iPhone 5S
 
Apple launched iPhone 5S and 5C with latest and amazing new features. As in my recent post i discuss about the features and pricing of iPhone 5C. But the almost all features of 5C is similar to iPhone 5. If you want more details about 5C then i recommend to take a look on Latest Features and Price of iPhone 5C.
But for others who are waiting for iPhone 5S. Here are the details about this new handset. iPhone 5S  having more amazing feature as my conclusion because of some new features and Apple also claim this phone as the first 64-bit smartphone.

Interesting Features of iPhone 5S


Body and Display features

  • The display of 5S also remain same to the size of iPhone 5 at 4.0 inches with the pixel density of  336 ppi.
  • iPhone 5s comes with the 64 bit and company also claim that this new iPhone 5S is the worlds first smartphone with 64 bit desktop class architecture.
  • This iPhone comes with A7 Chip and also with M7 motion co-processor.

Latest Touch id-  Fingerprint Scanner

This is latest techniques used in the phone for increasing security. Touch id help you to make your data, apps more secure. This proves that company is taking some serious steps to make products more secure. 

This sensor itself is 170 micron thick and able to scan the finger prints at 550dpi. It detector is able to scan the print at any angle. This sensor is in the four different layers, Tactile switch, touch id sensor, stainless steel detection ring and laser-cut sapphire crystal.

iPhone 5S - Finger print scanner

The most important thing about this scanner is they never stores your finger print on the server. Each phone is response for every finger prints. That means their is no chance of any hacked of finger prints.

8MP iSight Camera with True tone Flash

  • The camera is capable to take shots in 10 frame per second in burst mode and 120 frames per second in slow motion videos at 720p
  • This phone comes with true tone flash with 1000 combination to give better performance is dark light that is why its dual LED Flash is named as True Tone Flash which adjust colors itself.
  • This Phone comes in three new colour tone that are Gold, Space grey ans silver. Apple also introduce 6 covers in leather with different color tones that are black, blue, yellow, red, beige and brown.
 iPhone 5S colors

Ready with  iOS 7


Apple latest redesign operation system version iOS 7 which comes available from 18th Sept for free upgrading. This phone comes with this new OS which makes your experience more better.

Availability and Pricing

iPhone 5S is priced as  $199 for 16 GB, $299 for 32 GB and $399 for 64 GB in US on contract bases of Two years.

Its is estimated that its price will be around Rs 50,000 in India for 16GB.

This is available from 20th Sept also with iPhone 5C for sale in US and It is estimated that this phone will available in India from November onwards. 

For more details and Inquired visit there Official site here

I hope you also like iPhone 5S and there features. Don't forget to leave your reviews on this new model.
sorce : safe tricks

Saturday, September 21, 2013

Secret Hacking codes for Android Mobile Phones:
1. Complete Information About your Phone 

*#*#4636#*#*
This code can be used to get some interesting information about your phone and battery. It shows following 4 menus on screen:
  • Phone information
  • Battery information
  • Battery history
  • Usage statistics
2. Factory data reset
*#*#7780#*#*
This code can be used for a factory data reset. It'll remove following things:
  • Google account settings stored in your phone
  • System and application data and settings
  • Downloaded applications
It'll NOT remove:
  • Current system software and bundled application
  • SD card files e.g. photos, music files, etc.
Note: Once you give this code, you get a prompt screen asking you to click on "Reset phone" button. So you get a chance to cancel your operation.

3. Format Android Phone

*2767*3855#
Think before you give this code. This code is used for factory format. It'll remove all files and settings including the internal memory storage. It'll also reinstall the phone firmware.
Note: Once you give this code, there is no way to cancel the operation unless you remove the battery from the phone. So think twice before giving this code.

4. Phone Camera Update

*#*#34971539#*#*
This code is used to get information about phone camera. It shows following 4 menus:
  • Update camera firmware in image (Don't try this option)
  • Update camera firmware in SD card
  • Get camera firmware version
  • Get firmware update count
WARNING: Never use the first option otherwise your phone camera will stop working and you'll need to take your phone to service center to reinstall camera firmware.

5. End Call/Power

*#*#7594#*#*
This one is my favorite one. This code can be used to change the "End Call / Power" button action in your phone. Be default, if you long press the button, it shows a screen asking you to select any option from Silent mode, AirPlane mode and Power off.
You can change this action using this code. You can enable direct power off on this button so you don't need to waste your time in selecting the option.

6. File Copy for Creating Backup

*#*#273283*255*663282*#*#*

This code opens a File copy screen where you can backup your media files e.g. Images, Sound, Video and Voice memo.

7.  Service Mode

*#*#197328640#*#*
This code can be used to enter into Service mode. You can run various tests and change settings in the service mode.

8. WLAN, GPS and Bluetooth Test Codes:

*#*#232339#*#* OR *#*#526#*#* OR *#*#528#*#* - WLAN test (Use "Menu" button to start various tests)

*#*#232338#*#* - Shows WiFi MAC address

*#*#1472365#*#* - GPS test

*#*#1575#*#* - Another GPS test

*#*#232331#*#* - Bluetooth test

*#*#232337#*# - Shows Bluetooth device address

9. Codes to get Firmware version information:

*#*#4986*2650468#*#* - PDA, Phone, H/W, RFCallDate

*#*#1234#*#* - PDA and Phone

*#*#1111#*#* - FTA SW Version

*#*#2222#*#* - FTA HW Version

*#*#44336#*#* - PDA, Phone, CSC, Build Time, Changelist number

10. Codes to launch various Factory Tests:

*#*#0283#*#* - Packet Loopback

*#*#0*#*#* - LCD test

*#*#0673#*#* OR *#*#0289#*#* - Melody test

*#*#0842#*#* - Device test (Vibration test and BackLight test)

*#*#2663#*#* - Touch screen version

*#*#2664#*#* - Touch screen test

*#*#0588#*#* - Proximity sensor test

*#*#3264#*#* - RAM version